Time planner
Time planner
Navigation Tip: Any Resource Dialog->Cost Tab->Time Planner
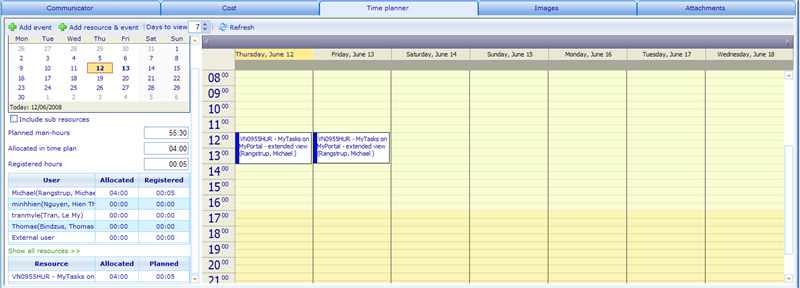
In the time planner you can plan the exact hours when a project team should carry out the project. In the time planner you will on the right side see three important times. The “Planned man-hours” show the time allocated for carrying out the project (or other type of resource). This value can be set on the General Information Tab. The “Allocated in time plan” shows the number of hours that have been allocated in the time planner (which we will show you how to do next). Finally the “Registered hours” shows the number of hours that have been registered on the project so far.
Under these three time totals you will see the allocated time and registered time split out on individual users.
If you click on the check box called “Include sub resources” it is possible to include or exclude resources that are children of the current resource. If e.g. a project has a number of related tasks and you want to see the total times including time planned, allocated, and registered on these resources summed up into the parent then you should include sub resources. Notice that you can highlight resources and users to set these in as defaults when adding events to the calendar. By clicking 'Show all resources >>' you will also see resources that do not have events related currently.
On the right side of the tab you will see a week and year control. This has no effect on the total times on the left side which shows total times independent of any date filtering. It is merely used to page through different weeks and see in detail where the time on the project has been allocated to.
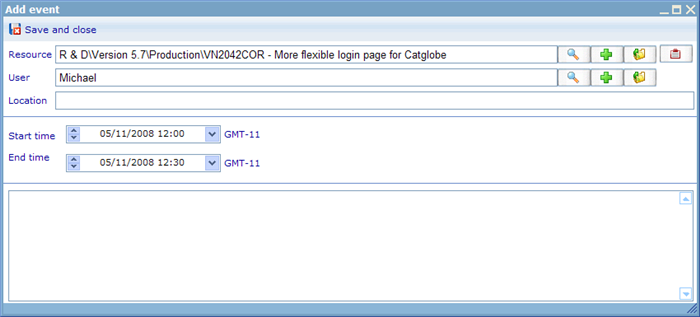
In order to allocate time to a specific date you must right click on the date column where you want the time planned and you will see a small menu. Here you will choose “Add event” and a dialog will appear where you can specify the resource on which the time will be used (default is of course the current resource), the user who will use time (default is the logged in user), the place the event will happen, and the start and end time for the event.
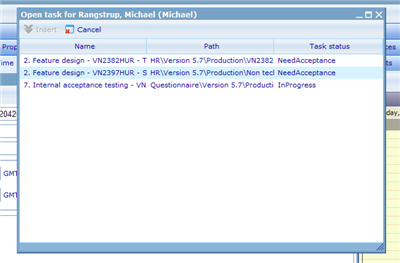
From version 5.6 there will at the end of the resource field be an additional button looking like a small applet ![]() . Button is only enabled when a user is chosen in the user field. Clicking this button will bring up a dialog where you can choose among all the unsolved tasks for that user. Example of the dialog is shown below.
. Button is only enabled when a user is chosen in the user field. Clicking this button will bring up a dialog where you can choose among all the unsolved tasks for that user. Example of the dialog is shown below.
Once you click save this time will be allocated to the resource and be visible in the time planner. An alternative to just adding an entry is the "Add resource & event", which will first ask you the type of resource you need to create, then when clicking save of the newly created resource an event dialog will pop up, which by default will have the newly created resource inserted.
Some other choices on the right click calendar are edit (which only is active when you right-click on an existing allocated time), remove, copy (which will activate the paste feature once you right click a different place in calendar), and Open personal calendar (which opens the logged in user if clicked on an area without allocated time and on the specific user for the allocated time if clicking on an allocated time box).
To move allocated time around it is possible to drag and drop allocated time boxes within the same date.


