Difference between revisions of "Blacklisting of phone numbers"
(jrfconvert import) |
|||
| Line 1: | Line 1: | ||
| − | [[Category: | + | [[Category:CATI_module]] |
| | ||
Revision as of 08:18, 12 May 2011
Blacklisting of phone numbers
The purpose of the blacklisted phone numbers module is to have a common list of phone numbers which will never be called by the CATI call system.
To access this module please navigate to Tools -> Administration -> Questionnaire -> Blacklisted phone numbers
You will here be presented with a page similar to below.
In this list is shown phone numbers which are blacklisted and therefore will never be called by the CATI module if the expired date of the blacklisting is not exceeded.
On this list you can choose to add individual new numbers to the blacklisted numbers or even ranges of numbers. Finally you can use the remove button to remove blacklisted numbers from the list so they can again be called or use the search button to search for specific blacklisted numbers (by number or expiration date).
Below we will explain a little more about the add and import features of blacklisted numbers.
Adding and editing blacklisted numbers
When you click the add button you will get a dialogue where you can add as many numbers in one go as you wish. Just make sure to choose all the information for each blacklisted number before saving.
You are required to choose a country code, an area code (if necessary), a phone number and an expire date. be aware that the default expire date is today's date, so you must likely want to set it to some time in the future.
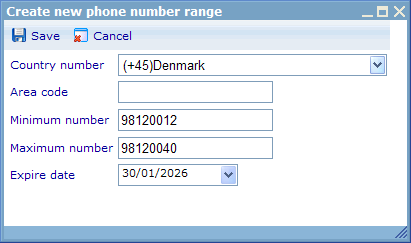
When we add ranges of blacklisted phone numbers we will see the following dialog.
Here we must choose country as well as a minimum and maximum range of the phone numbers we wish to blacklist. If the number has an area code this should be supplied as well.
Importing blacklisted numbers
If you have your blacklisted numbers in an excel format you can use the import wizard to import them to Catglobe.
Below is an example of phone numbers in a work sheet format.
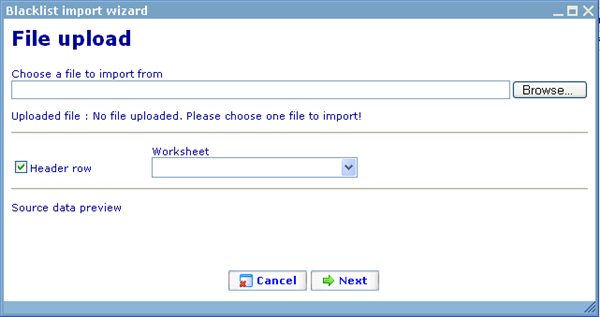
The first dialogue you will see is the file choice page.
Here please choose the excel file from your hard disk that you want to import. After this choose the specific work sheet in this file.
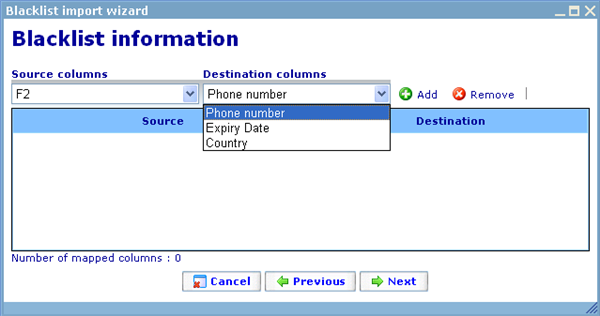
When clicking next you will be introduced to the page where you must map your source columns to the three destination columns; phone number, expire date and country.
The requirements for each of the source columns are as follows:
Phone number: Phone number may contain only: 0 to 9, space, #, *, ( and ).
Expire date: Value in this column must follow format ‘yyyy-MM-dd’. Date value that does not apply this scheme will violate the import rule and will receive an error at validation step. Value must also be larger than today's date. If this column is not imported then date will be set to two years from current date.
Country code: Value in this column must exist in ‘country code’ column values of the Country table. If value does not exist in database on the country table then a validation error will be shown. To see the standard list of countries and codes please click here.
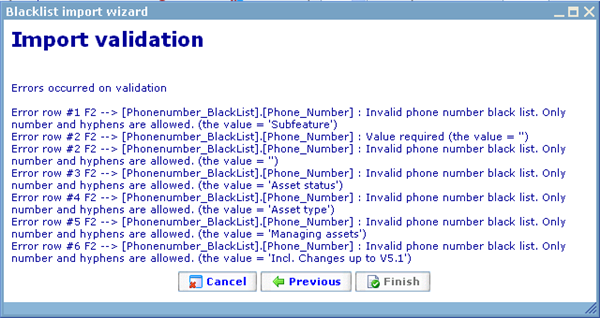
Once you have done this you can go to the last step where your data will be validated before import. If any of your data are not accepted due to the above requirements it will be shown in this step as illustrated below. To read more on the validation that is used please refer to validation rules described in the import module; click here to read in detail.
If no validation problems were found the Finish button will be activated and you can finalize your import!
From version 5.4 a validation on the length/format of the number in comparison with legal number formats in a number of countries is carried out. To read more on this validation check and the logic behind it, please click here.


