Setting up target groups: Difference between revisions
More actions
jrfconvert import |
No edit summary |
||
| (2 intermediate revisions by one other user not shown) | |||
| Line 1: | Line 1: | ||
[[Category: | [[Category:Campaign diagram]] | ||
| {{HelpFiles_Report_Module}} | ||
====Setting up target groups==== | ====Setting up target groups==== | ||
Latest revision as of 09:04, 13 December 2011
Setting up target groups
Setting up target groups works the same way in both the common properties dialog as in the tracking, campaign and comparison diagrams.
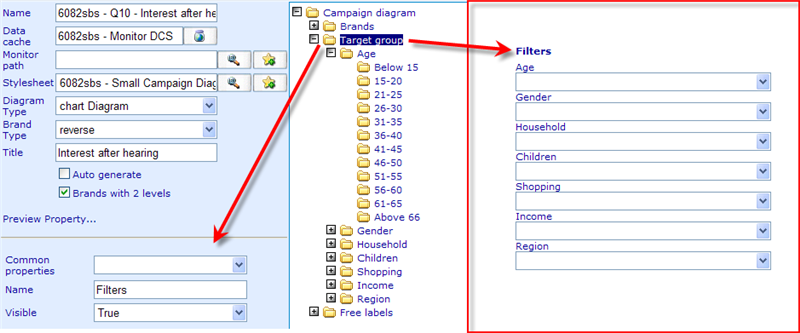
When highlighting the Target group folder there are three possible settings:
Common properties: Decides whether the target groups for the diagram will be inherited from a common property. If you set up both common properties and also set the diagram to have its own target groups, a combination of both will be shown in the control!
Name: The name that will appear above the target group drop downs of the target group filter control. In this example the name is set to 'Filters'.
Visible: Decides whether the diagram will show or hide the control!
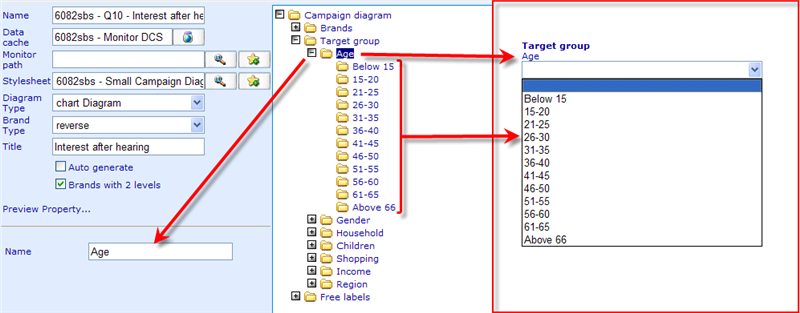
You can now right click on the target group folder and start adding main categories to your target group control. Each main category can be given a name.
In the main categories you can then add the actual filters! The filters you add will turn up as elements in the main categories.
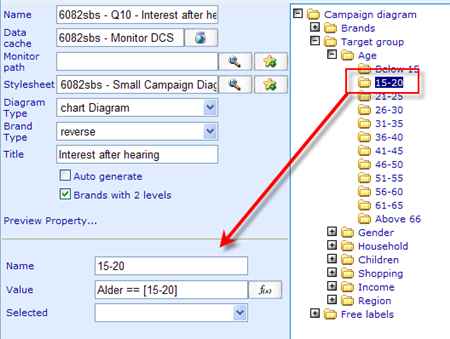
Let us look at how you create each of these filter options:
When adding target groups, expressions differ from brands in that they just state part of a complete expression. You will not have the function name but just a logical operator. The logical operator will typically be a data cache column, an operator and a value to compare with.
Examples are:
Gender==1
Age==[15-20]
Age>=60
Gender==1 && Age>=60


