MySQL database installation guide
More actions
MySQL database installation guide
MySql distribution to install
Version 5.0
How to get MySql
http://dev.mysql.com/downloads/mysql/5.0.html
Installing MySql on Windows
Installation Package : indows (x86) ZIP/Setup.exe
Install MySql with the Automated Installer : Unzip the package, and run setup.exe file
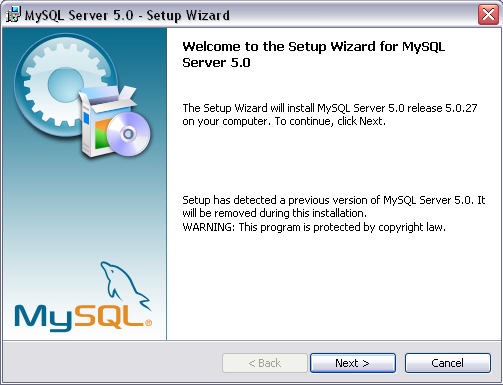
Installation Steps : After double clicking the setup file, the Setup Wizard is started. Click Next button to start on Step 1.
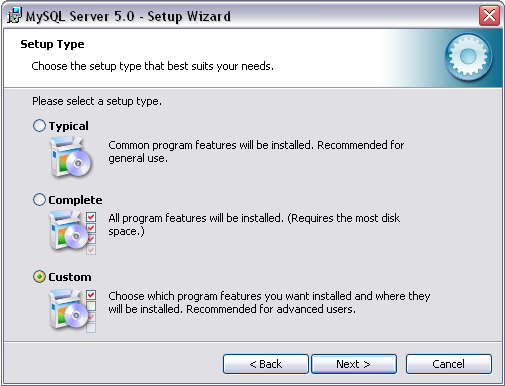
Step 1 - Choose the setup type
Click Custom radio button in order to select the needed features to install. Click Next button to go to step 2.
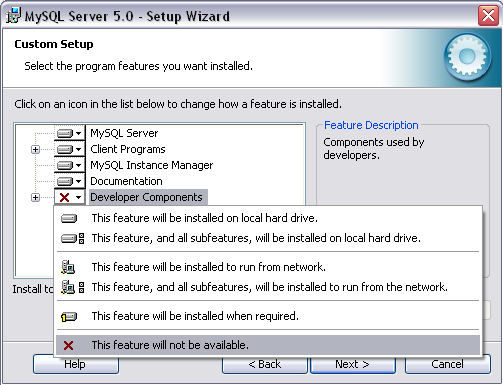
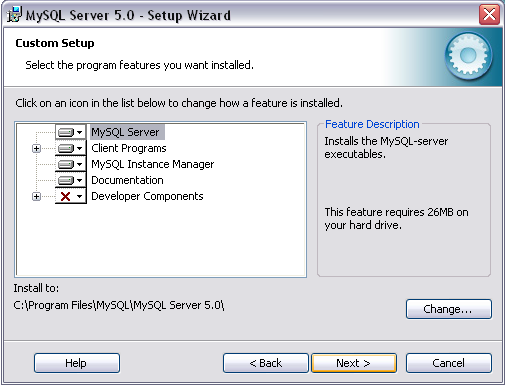
Step 2 - Custom Setup
Click Developer Components button and choose This feature will not be available to have developer components not to be installed.
Click Change… button to modify the location for installing MySql (if necessary). Click Next button to go to Step 3
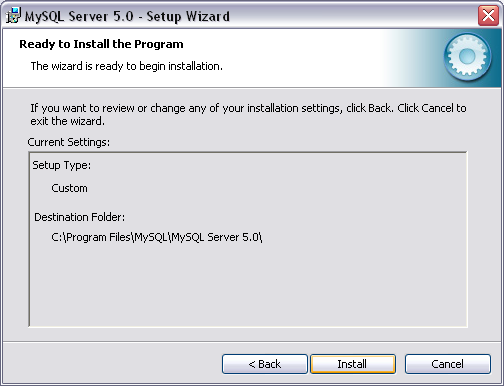
Step 3 - Install the program
Read the current settings summary before starting to install. Click Install button to start installing.
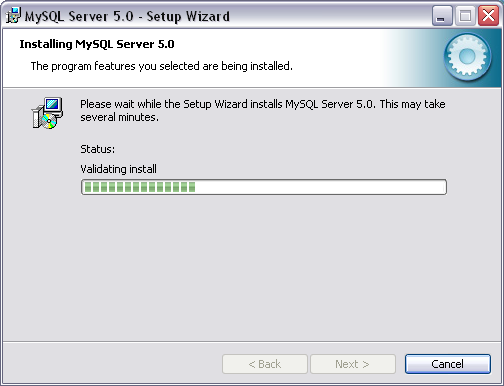
The installation progress is shown.
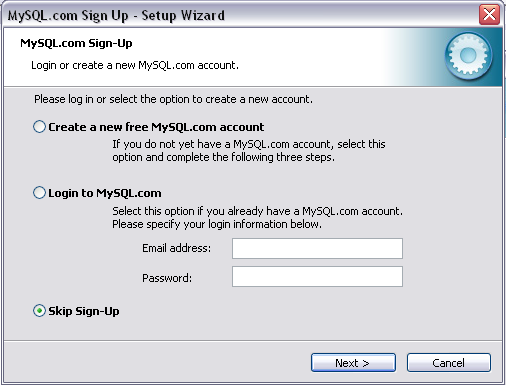
At the final step of the installation progress, you are asked to sign up to MySql.com.
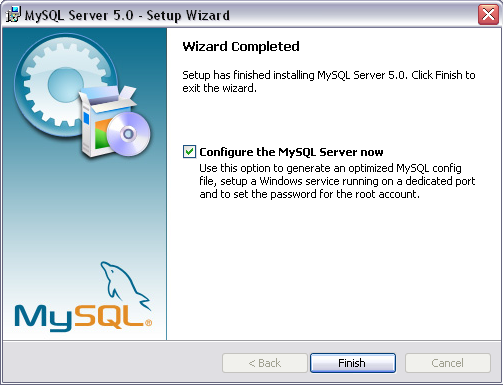
Finalizing the wizard
Check Configure the MySql Server now checkbox to start configuration wizard or uncheck to start it later.
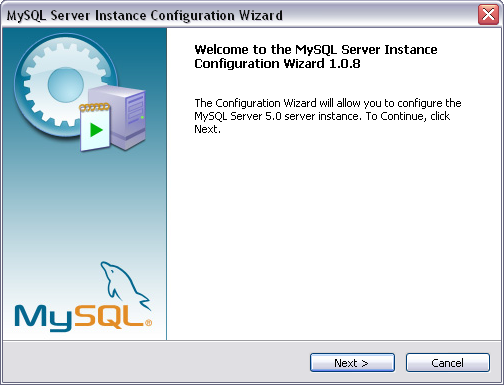
Configuration Wizard
Click Next button to go to Step 1.
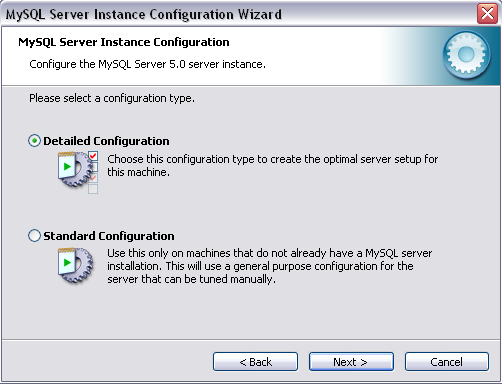
Step 1 - Select configuration type
Click Detailed Configuration radio button and press Next button to go to step 2.
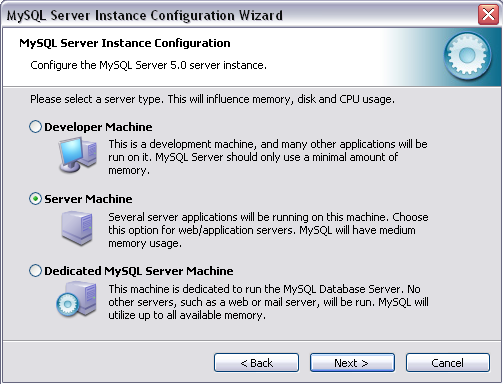
Step 2 – Select a server type
Click Server Machine radio button to have server applications to run on the current machine. Press Next button to go to Step 3.
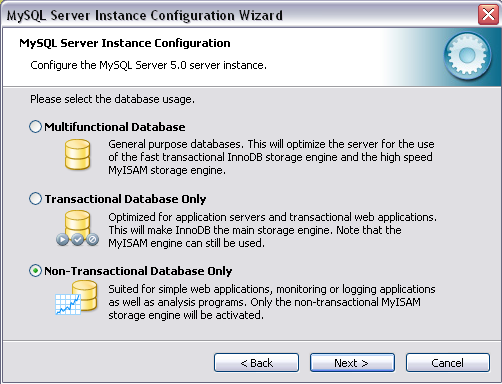
Step 3 – Select database usage
Click Non – Transactional Database Only radio button to activate only the non – transaction MyISAM storage engine. Press Next button to go to Step 4.
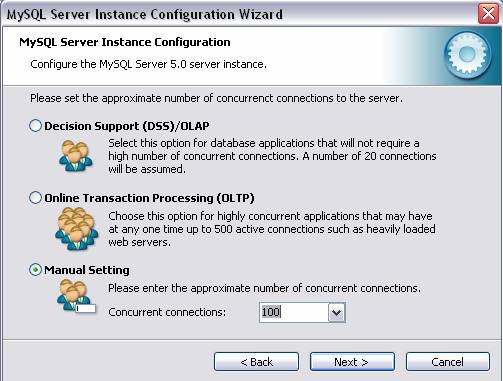
Step 4 – Number of concurrent connections
Click Manual Setting radio button and set the approximate number of concurrent connections to the server to 100. Click Next to go to Step 5.
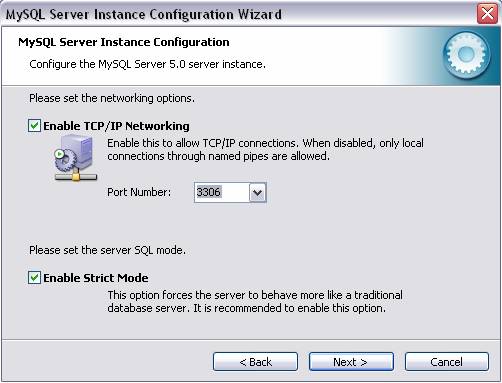
Step 5 - Enable TCP/IP Networking and Strict mode
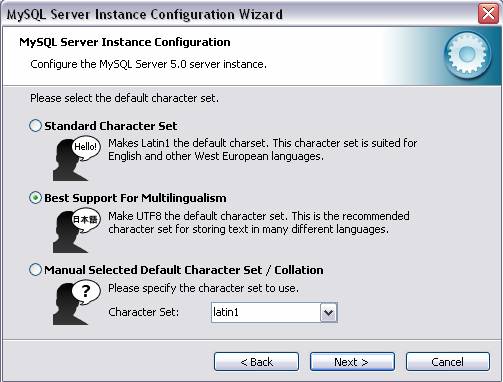
Step 6 - Set the default character set
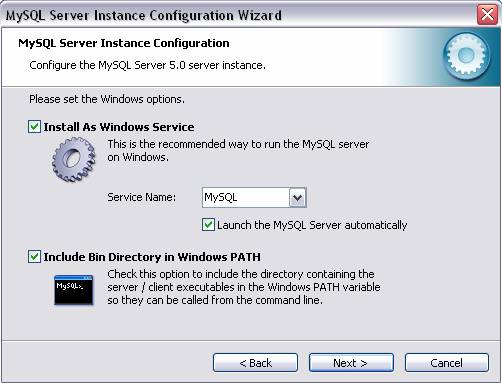
Step 7 - Set the Windows options
Check Install As Windows Service checkbox and change the service name (if necessary).
Check Launch the MySql Server automatically checkbox.
Check Include Bin Directory in Windows PATH checkbox in order to be able to access MySql via the command line.
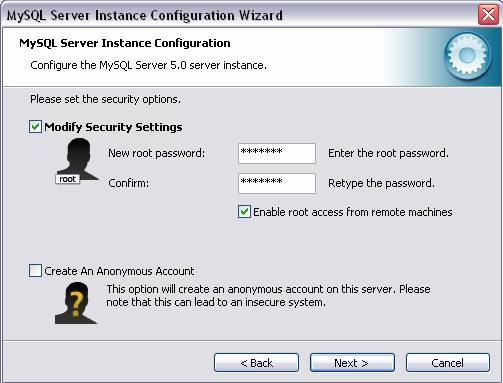
Step 8 - Set the security options
It is very important to check Enable root access from remote machines checkbox in order to make the Data Cache Specification module work.
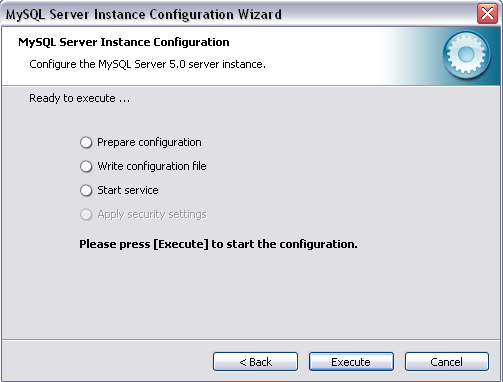
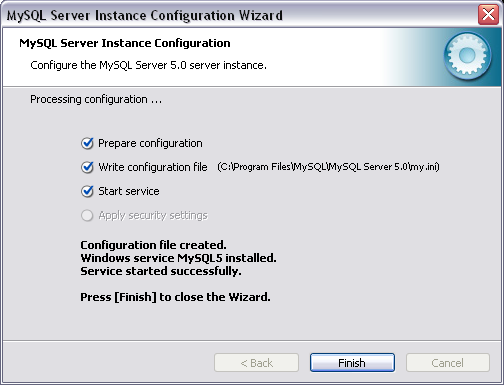
Finalizing steps
System variables settings
File to modify
§ …\MySQL\MySQL Server 5.0\my.ini
§ (C:\Program Files\MySQL\MySQL Server 5.0\my.ini if you have not changed the default directory for installing MySql)
System variables
§ query_cache_size=0M
§ max_connections = 100
§ table_cache = 256
§ tmp_table_size = 100MB
§ myisam_sort_buffer_size=5MB
§ key_buffer_size = 100MB
After changing any system variables, restart MySql service.
Disk issues
Data directory should be on a fast drive.
System variable to modify
§ datadir="…/Data/"
Before modifying the value of datadir, stop MySql service.
After setting the datadir system variable to a different place, move the Data subfolder (…\MySQL\MySQL Server 5.0\data) to that location and then restart the service.

