NUnit support tools
More actions
<accesscontrol>Main:MyGroup</accesscontrol>
Introduction
NUnit is one of the most popular tool for unit testing in .NET. And the most important thing is that it is used inside CatGlobe and now we are approaching Test-Driven-Development, this means that developers/testers must involve in using NUnit more and more.
In this page, I will introduce some small supporting tools that can add some value working with NUnit.
NCover and NCoverExplorer
NUnit does not provide a mean for checking code coverage, we have to use some third-party tools. The easiest and free tool is NCover. However, NCover just supports for exporting the code coverage result into xml file. Luckily we also have another free tool for exploring the coverage result - NCoverExplorer
Download the 2 tools from:
- NCover: http://ncover.org
- NCoverExplorer: http://www.kiwidude.com/dotnet/DownloadPage.html
NCover
NCover is a console application, it receives another application as main parameter. The target application has its own parameter and NCover does have its own parameter too. So, parameters that start with one slash (/) belong to the target application and parameters starting with 2 slashes (//) belong to NCover.
Below is the simplest command use for starting NUnit-gui (create a .bat file and paste the following content for later reuse):
set NCover=C:\Program Files\NCover\NCover.Console.exe
set NUnitGui=C:\Program Files\Nunit 2.4.8\bin\nunit.exe
set CatGlobeHome=D:\svn\Trunk_CodeReview
set DomainTesterNUnit=%CatGlobeHome%\DomainTester\DomainTester.nunit

"%NCover%" //a "DomainTester;Catglobe;CatTaskCommon;ReportLayout2006" "%NUnitGui%" "%DomainTesterNUnit%"  /config=Release
In which:
- //a: NCover's parameter that list all assemblies that will be checked for code coverage
- /config=: 2 possible configurations Debug/Release
Now, the command console will open an instance of NUnit-gui with the project specified as %DomainTesterNUnit%. You can choose test to run, then close the NUnit-gui. After the gui was closed, the command console is still running without more information, please be patient waiting until the console close itself. Otherwise, the coverage result will not be produced. If everything goes as expected, a file named Coverage.xml is generated in the working directory.
NCoverExplorer
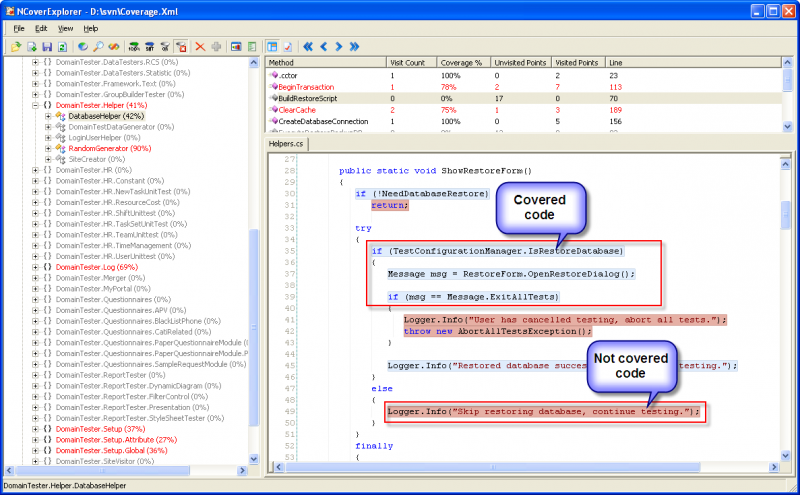
The Coverage.xml is not user friendly. We get almost nothing from the file except opening it with NCoverExplorer. Below is a sample NCoverExplorer:
NUnit HTML report generator
There are time when we need to store the result after one unit test running for later reference. NUnit can export the run result into an XML file, however it is not user friendly. In this section, I will introduce a free tools for generate HTML report from such XML file.
The tool is NUnit2Report, its homepage is http://nunit2report.sourceforge.net/
The tool is in fact a NAnt task, so we must have NAnt installed. Homepage of NAnt: http://nant.sourceforge.net/
Installation
- Download the latest version of NAnt
- Unzip it to a folder name %NANTHOME%
- Make sure %NANTHOME%\bin folder is in your PATH environment variable
- Download the later version of NUnit2Report
- Unzip the file to a folder name %NUNITREPORTHOME%
- Copy all file if %NUNITREPORTHOME%\bin to %NANTHOME%\bin
Usage
- Export test running result to xml file. This can be done in 2 ways:
- With NUnit-gui, after running the test, go to menu Tools -> Save Results as XML
- With Nunit-console, by default a file TestResult.xml will be generated in working directory. Otherwise, you can set the output file by putting /output parameter
- Assume we have a result file as %RESULT%\TestResult.xml, create a text file in folder %RESULT% with extension .build
- Copy following content to the file:
<?xml version="1.0" encoding="ISO-8859-1" ?>
<project name="NUnitReport" default="nunitreport" basedir=".">
	<tstamp property="build.date" pattern="dd-MM-yyyy" verbose="true"/>
	<sysinfo/>
	<target name="nunitreport">
		<nunit2report out="DomainTester.html">
			<fileset>
				<include name="TestResult.xml" />
			</fileset>
		</nunit2report>
	</target>
</project>
In which:
- DomainTester.html: HTML output file name
- TestResult.xml: NUnit test result file name
- Now, it's ready for generating the report. Open command line console (cmd.exe), move to folder %RESULT%, type nant (make sure NAnt's bin folder is in your PATH environment or you would get an invalid path error message)
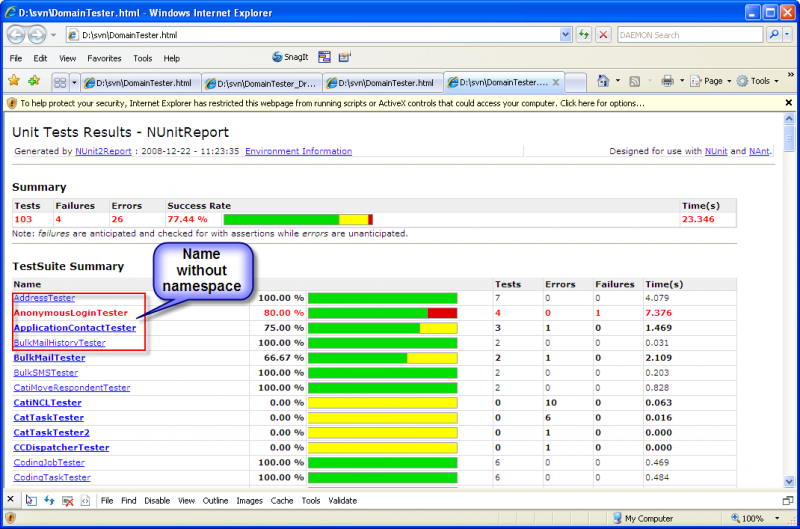
- A DomainTester.html is generated in folder %RESULT%. Open it and you will get something like this:
Sorting by namespace
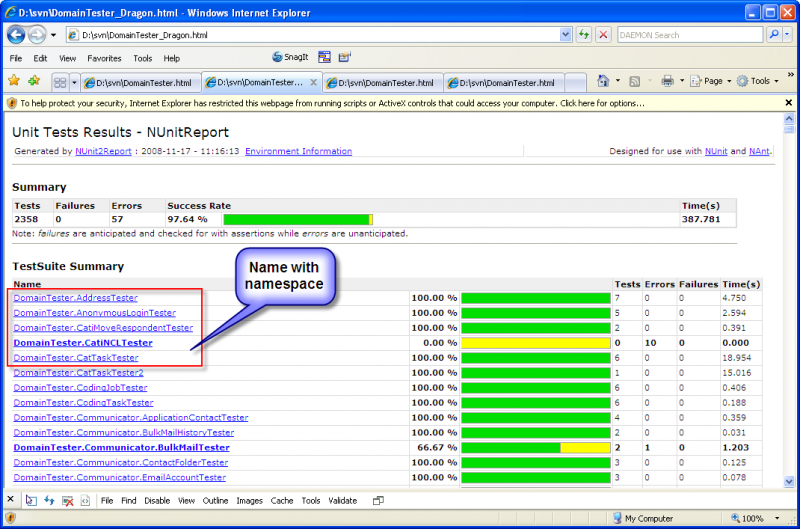
Note that, the result is alphabetically sorted by TextFixture's name, this is not the same as in NUnit-Gui which groups TestFixtures by its namespace. If this causes problem identifying the correct method on NUnit-Gui by referencing to the HTML report (you might want to re-run a failed test method after fixing something) then the following tool can give some help.
Usage
- Copy \\catproc\Share\CatGlobe Teams\R & D\Personal\Chinh\RefineNUnitTestResult.exe to the same folder as TestResult.xml
- Run the executable. Note: the programe requires no argument and will update the TestResult.xml.
- Now, run NAnt as above and you will get some thing as below:
One click restore database
When running with nunit-console.exe, we don't have feature for selecting backup for restoring but having to prepare the database by ourselves. Most of the time, the name of database and backup file are the same. This section provides a small utility for restoring database in a click instead of lots of clicks/selections using SQL Management Studio.
Moreover, if using the SQL Management Studio, the restored database must have no connection to it otherwise the restoring process would fail. This utility, disconnect all connections to the restored database as a preparing step, so making sure that restoring always success.
The utility includes 2 files: a .sql and a .bat. The .bat file is the entry point, its main purpose is launching SQL statements inside .sql file.
.sql file
- Create a .sql file, for example: restoredatabase.sql
- Copy following lines as content:
declare conns cursor
for
select spid
from  master.dbo.sysprocesses
where dbid <> 0 and db_name(dbid)='UnitTest57'

declare @spid as int
OPEN conns
FETCH NEXT FROM conns INTO @spid
WHILE (@@FETCH_STATUS <> -1)
BEGIN
    declare @sql as varchar(max)
    set @sql = 'KILL ' + cast(@spid as varchar(50))
    execute(@sql)
	FETCH NEXT FROM conns INTO @spid
END
CLOSE conns
DEALLOCATE conns
GO


RESTORE DATABASE UnitTest57 FROM  DISK = N'D:\databases\UnitTestBase_FOR_57.bak' WITH  FILE = 1,  NOUNLOAD,  REPLACE,  STATS = 10
In which:
- UnitTest57: name of the restored database
- D:\databases\UnitTestBase_FOR_57.bak: path to the backup file
.bat file
This file is rather simple. It is for user to make a double-click on to start restoring. Its main purpose is to running all SQL statements inside .sql file
sqlcmd -S localhost -d master -i "D:\databases\restoredatabase.sql"
pause
In which:
- D:\databases\restoredatabase.sql: path to the .sql file created above
One click attach NUnit
This section shows you how to simplify the task of attaching a debugger to NUnit for debugging test code. The main idea is defining a macro for Visual Studio 2005/2008 and create a command for the macro to ease accessing of the macro.
Create attaching macro
- Download \\catproc\Share\CatGlobe Teams\R & D\Personal\Chinh\MacroAttachNUnit.zip
- Unzip Debug.vb in the zip file to your local drive
- Open Macros IDE of Visual Studio 2005/2008 by either going to menu Tools -> Macros -> Macros IDE or pressing Alt + F11
- In Macros IDE's Project Explorer Windows, right click on MyMacros and choose Add -> Add Existing Item. Then point the file browser to Debug.vb
- Close Macros IDE
Now, open the Macros Explorer by either going to menu Tools -> Macros -> Macro Explorer or pressing Alt + F8. There is a macro named DebugNunit under MyMacros.Debug, double clicking on it to attach to NUnit GUI application.
Create command button
To hide away all macro related things, we will create a button on toolbar for quick clicking.
- Right click on toolbar of VS2005/2008, choose Customize
- In tab Toolbars, click New, then enter CatGlobe
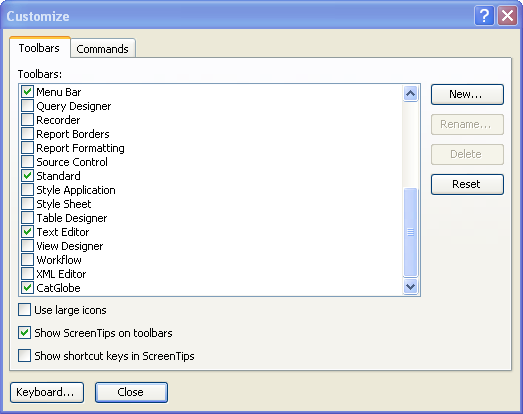
- A new toolbar will be displayed floating, double click its header to pin it to the top of VS
- In tab Commands, brose to Macros in Categories list
- In Commands list, find the command MyMacros.Debug.DebugNunit and drag it to the new toolbar

Now, you should have something like this:
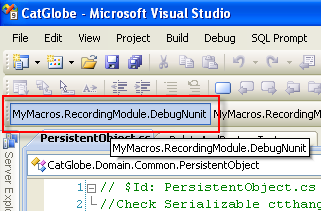
Clicking on the button will attach to NUnit for debugging
Notes
- The command does not open an new NUnit-gui, there must be an instant of NUnit-gui running. If no NUnit-gui is running, then there is an exception like this:
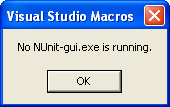
- If there are 2 NUnit-gui open at the same time, the one that is open first will be attached
Reduce number of test methods
Currently, DomainTester project contains already more than 2000 test methods, making it really heavy for loading. While developing usually we want to test only a few methods but waiting for the whole assembly to be loaded is really a waste of time. Luckily, most of our test fixtures are independent to each others, they only depend on some common classes. This section introduces the reduced version of DomainTester that can help speed-up developing a bit.
Steps:
- Right click on CatGlobe.sln in Solution Explorer of VS2005/2008
- Choose Add->Existing project ...
- Browse to DomainTester-reduced.csproj in the same folder with DomainTester.csproj (this file is currently available on trunk only)
Now, we have 2 testing projects in CatGlobe.sln, which are exactly the same except the number of included files. Then it's your choice of adding any test fixtures that you are working on. Build the project, reload the test in NUni-gui, it should be really fast.
